If you have a locally-hosted version of a web site for testing or development, you’ll almost certainly want to test it on a mobile device.
Let’s say the local site is hosted on Mac OS X, and you access it with a URL containing a hostname defined locally in the Mac’s “hosts” file, such as http://exampledev.com.
How can you test the site using the same URL on a mobile device (that is, a real mobile device, not an emulator)—without jailbreaking the device, using a DNS server, or paying for additional software? In this post I’ll describe a way to do exactly that.
Some background
But first a bit of background.
The quickest way to view a locally-hosted site on a mobile device is to simply use the local IP address of your computer in the “host” portion of the URL, for example http://192.168.1.11.
However some web sites don’t like being accessed with a mixture of different IP addresses and hostnames on different devices—perhaps because they use absolute links or some kind of host header validation. In that case, you’d need to configure the site to use that IP address on all devices, even the computer. Depending on your situation, this may not be ideal—and besides, it doesn’t look great.
What if you want to use a local hostname on all devices?
If you have access to a DNS server—perhaps there’s one in your router—then great, all devices can use that instead of a local hosts entry. But in a typical home network-type environment, running your own DNS server may not be straightforward.
Another option is to modify the local hosts file on the mobile device itself. But many mobile devices don’t allow this, or else are locked down by the carrier to prevent it. For example, iOS requires you to jailbreak the device before you can view or edit its local hosts file.
What if you don’t want to jailbreak the mobile device, and you can’t edit its local hosts file? The solution I’m going to describe gives you an easy way to view a local Mac OS X website on a mobile device:
- using the same locally-defined hostname on both the Mac and the mobile device e.g. http://exampledev.com
- using only free software
- without setting up or using a DNS server
- without jailbreaking the mobile device or updating its local hosts file.
The solution
The standard solution is to run an HTTP proxy server on the computer where the site is running, and then configure the mobile device to use the proxy.
The mobile device is then able to resolve the hostname on the computer, even though it’s defined in the computer’s local hosts file, because it uses the proxy for DNS resolution.
There are already good instructions on how to do this—on Mac OS X you can use the Charles web debugging proxy, and on Windows you can use a free HTTP proxy called Fiddler.
But the Charles Mac web proxy is not free: at the time of writing a single-user license costs $50. This might be worth it if you want to use Charles’ advanced debugging features to intercept the HTTP traffic between client and server.
But what if all you want to do is view the site on a mobile device to see how it looks and behaves? Are there any free and simple HTTP proxies available for the Mac that will do the job?
As it turns out, there are a several of options. One is to use the built-in Apache web server that comes with Mac OS X, which is normally used for “Web Sharing” (System Preferences → Sharing → Web Sharing). By modifying its configuration to enable mod_proxy, you can make it act as a proxy.
While this is a perfectly reasonable solution, it’s a little fiddly to set up, so I won’t describe it here.
Instead the solution I’ll describe uses a free and simple standalone proxy called SquidMan, which is a friendly Mac front-end to the popular Unix caching proxy Squid. SquidMan also has a really cool-looking icon depicting a bright pink octopus.
However, the overall principle can be applied using any HTTP proxy—just replace Steps 2 and 3 with the proxy of your choice.
So, here’s how you do it.
Step 1. Create a local hostname
If you haven’t already, make sure you have a local hostname for the site, for example exampledev.com, mapped to 127.0.0.1 (localhost) in your Mac’s local hosts file.
1. Open a Terminal (Applications → Utilities → Terminal.app), and edit the local hosts file (/etc/hosts) using a text editor such as vim:
sudo vim /etc/hosts2. Enter your password when prompted, and add the new domain name at end:
127.0.0.1 exampledev.com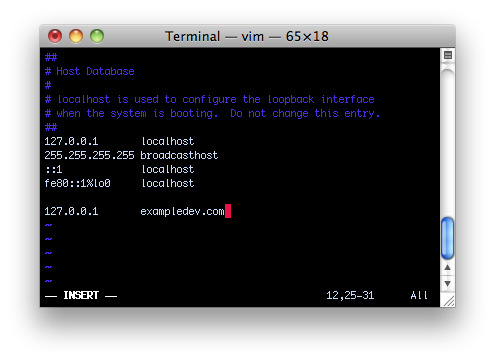
Note that several commenters reported below that using .local as your top-level domain may not work for this purpose.
Once that’s in place, make sure you can access your site with the local hostname in a URL such as http://exampledev.com on the Mac. Make sure everything in the web site works with this URL.
Step 2. Install the proxy
The next step is to install the HTTP proxy on the machine where the local site is running, which in this case will be SquidMan.
- Download and install SquidMan from the following URL: https://squidman.net/squidman/index.html
- Run SquidMan.app.
The first time you run SquidMan, it may prompt for admin credentials so that it can install some system stuff.
OS X may also ask you Do you want the application “squid” to accept incoming network connections? In this case you need to allow incoming connections, because the incoming connections to Squid will be from other devices on your network.
Note: SquidMan is a UI for controlling Squid. Squid is the actual HTTP proxy. Squid can run in the background regardless of whether SquidMan is still running. You only use SquidMan to configure, monitor, start and stop Squid.
Step 3. Configure the proxy
The next step is to configure Squid using the SquidMan UI.
Go to SquidMan → Preferences, and set the following.
General tab
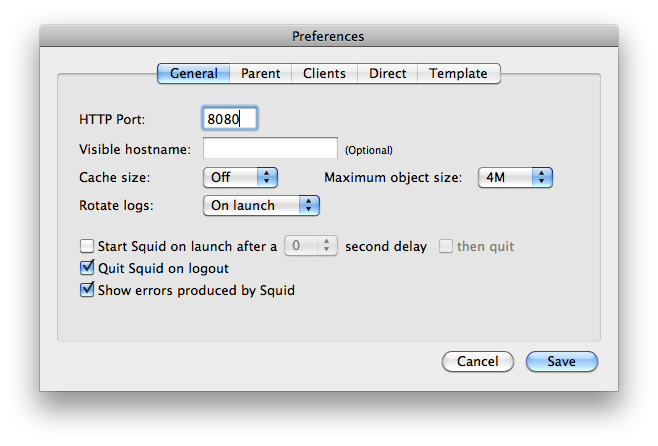
On the General tab, set the HTTP Port squid will listen on.
The default is 8080, which works fine.
Clients tab
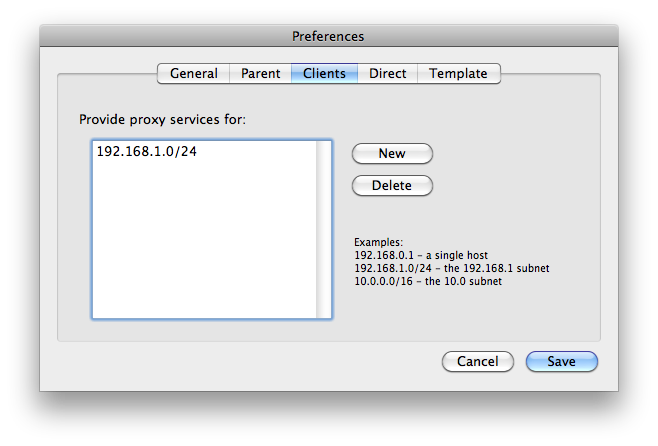
On the Clients tab, enter the IP address (or IP address range) of the clients you want to be allowed to use the proxy, in this case your mobile devices.
If your mobile device is running iOS, you can find its own local IP address by going to Settings → Wi-Fi, then find your network, and tap its blue “>” icon.

Then look under IP Address.
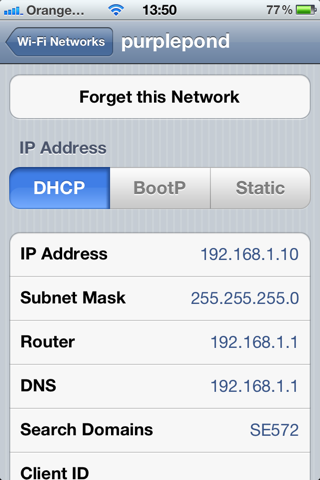
In this example the phone’s local IP address is 192.168.1.10.
Alternatively, you can specify a range of IP addresses, which is especially useful if you have multiple devices. Your router probably assigns IP addresses from a fixed range according to its DHCP settings. The SquidMan UI displays some useful examples—for example you can put 192.168.1.0/24 to allow the whole 192.168.1 subnet to use the proxy.
Template tab
Squid uses a configuration file called squid.conf.
However, you don’t need to touch this file directly. Instead, SquidMan automatically generates this file when you start Squid, based on what you put in the Template tab in the UI. (If you edit the actual squid.conf file directly then it will just get overwritten.)
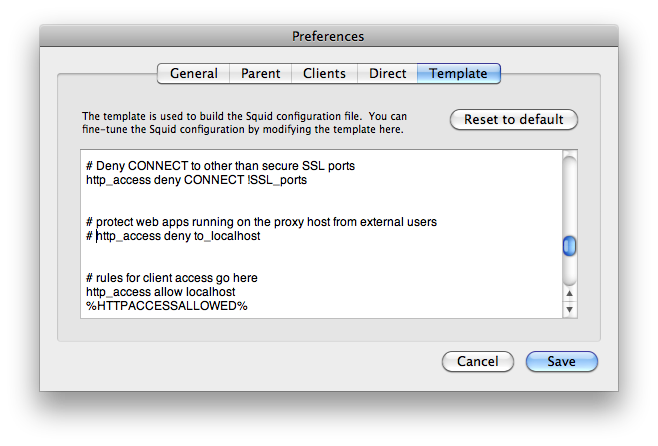
The first change you need to make in the Template tab is to find the following section:
# protect web apps running on the proxy host from external users
http_access deny to_localhost
…and comment out the second line with a #.
If you leave this line uncommented, Squid will block clients from accessing web content hosted on the same machine that Squid is running on, which results in an “Access Denied” message when you attempt to access the local web site. Clients will be able to use the proxy, but only to access external web sites.
The reason for this piece of configuration being enabled by default is that the normal usage pattern for an HTTP proxy is to use it to access content hosted elsewhere, not on the same machine as the proxy. Hence, if you want Squid to serve files hosted on the same machine as itself you need to remove the constraint by commenting out this directive.
Next, you need to tell Squid where your hosts file is, by adding the directive shown below. Thanks to Tomek Augustyn for pointing this out (for some reason it wasn’t necessary on my machine).
# hosts file
hosts_file /private/etc/hosts
I do not think the use of /private/etc/hosts vs. /etc/hosts is significant here—they actually reference the same file, since /etc is a symlink to /private/etc in OS X.
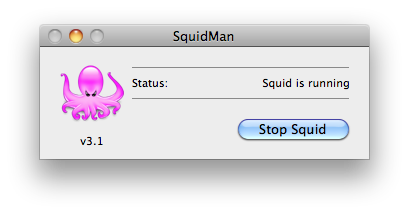
Finally click the Start Squid button to run the proxy.
Step 4. Configure the mobile device to use the proxy
The next step is to configure the mobile device to use the proxy.
On the client device such as a phone or tablet, you’ll need to configure the device to use an HTTP proxy by specifying the proxy’s IP Address and Port.
You can determine the proxy’s IP Address and Port as follows.
- The IP Address of the proxy is simply be the local IP address of the Mac on which you installed SquidMan, which you can find in System Preferences → Network → IP Address.
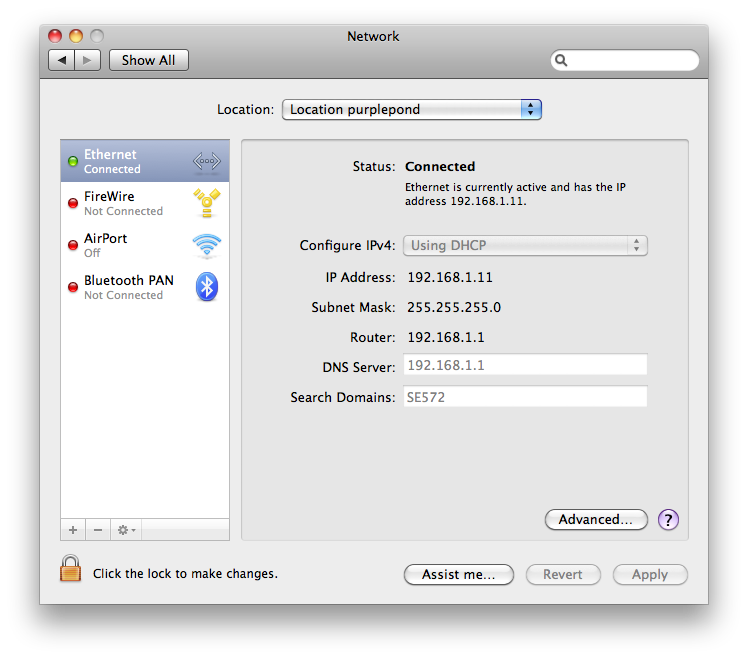
In this example the Mac’s local IP address is 192.168.1.11.
- The Port of the proxy is the port that you configured Squid to listen on, e.g.
8080.
The specific steps required to configure your mobile device to use this proxy depend on the mobile OS—the instructions below are for iOS, but other mobile OS’s should be similar.
Configuring a mobile device running iOS to use the proxy
A mobile device running iOS can be configured to use the proxy as follows.
- Go to Settings → Wi-Fi, find your Wi-Fi network, and tap the blue “>” icon for your network.
- Scroll to the HTTP Proxy section at the bottom, tap Manual, and enter the proxy’s IP Address in the Server field and Port in the Port field.
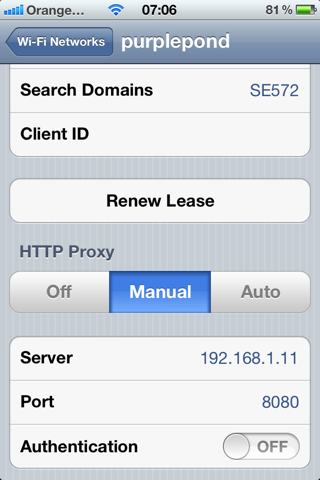
To stop using the proxy, tap on Off under HTTP Proxy. For a while, it remembers your settings so that all you have to do is tap Manual to turn it on again.
The end result
After this is done, you should be able to sync all your local site’s bookmarks between your Mac and mobile device(s), and the site should be fully operational using the same locally-defined URLs on all devices.